
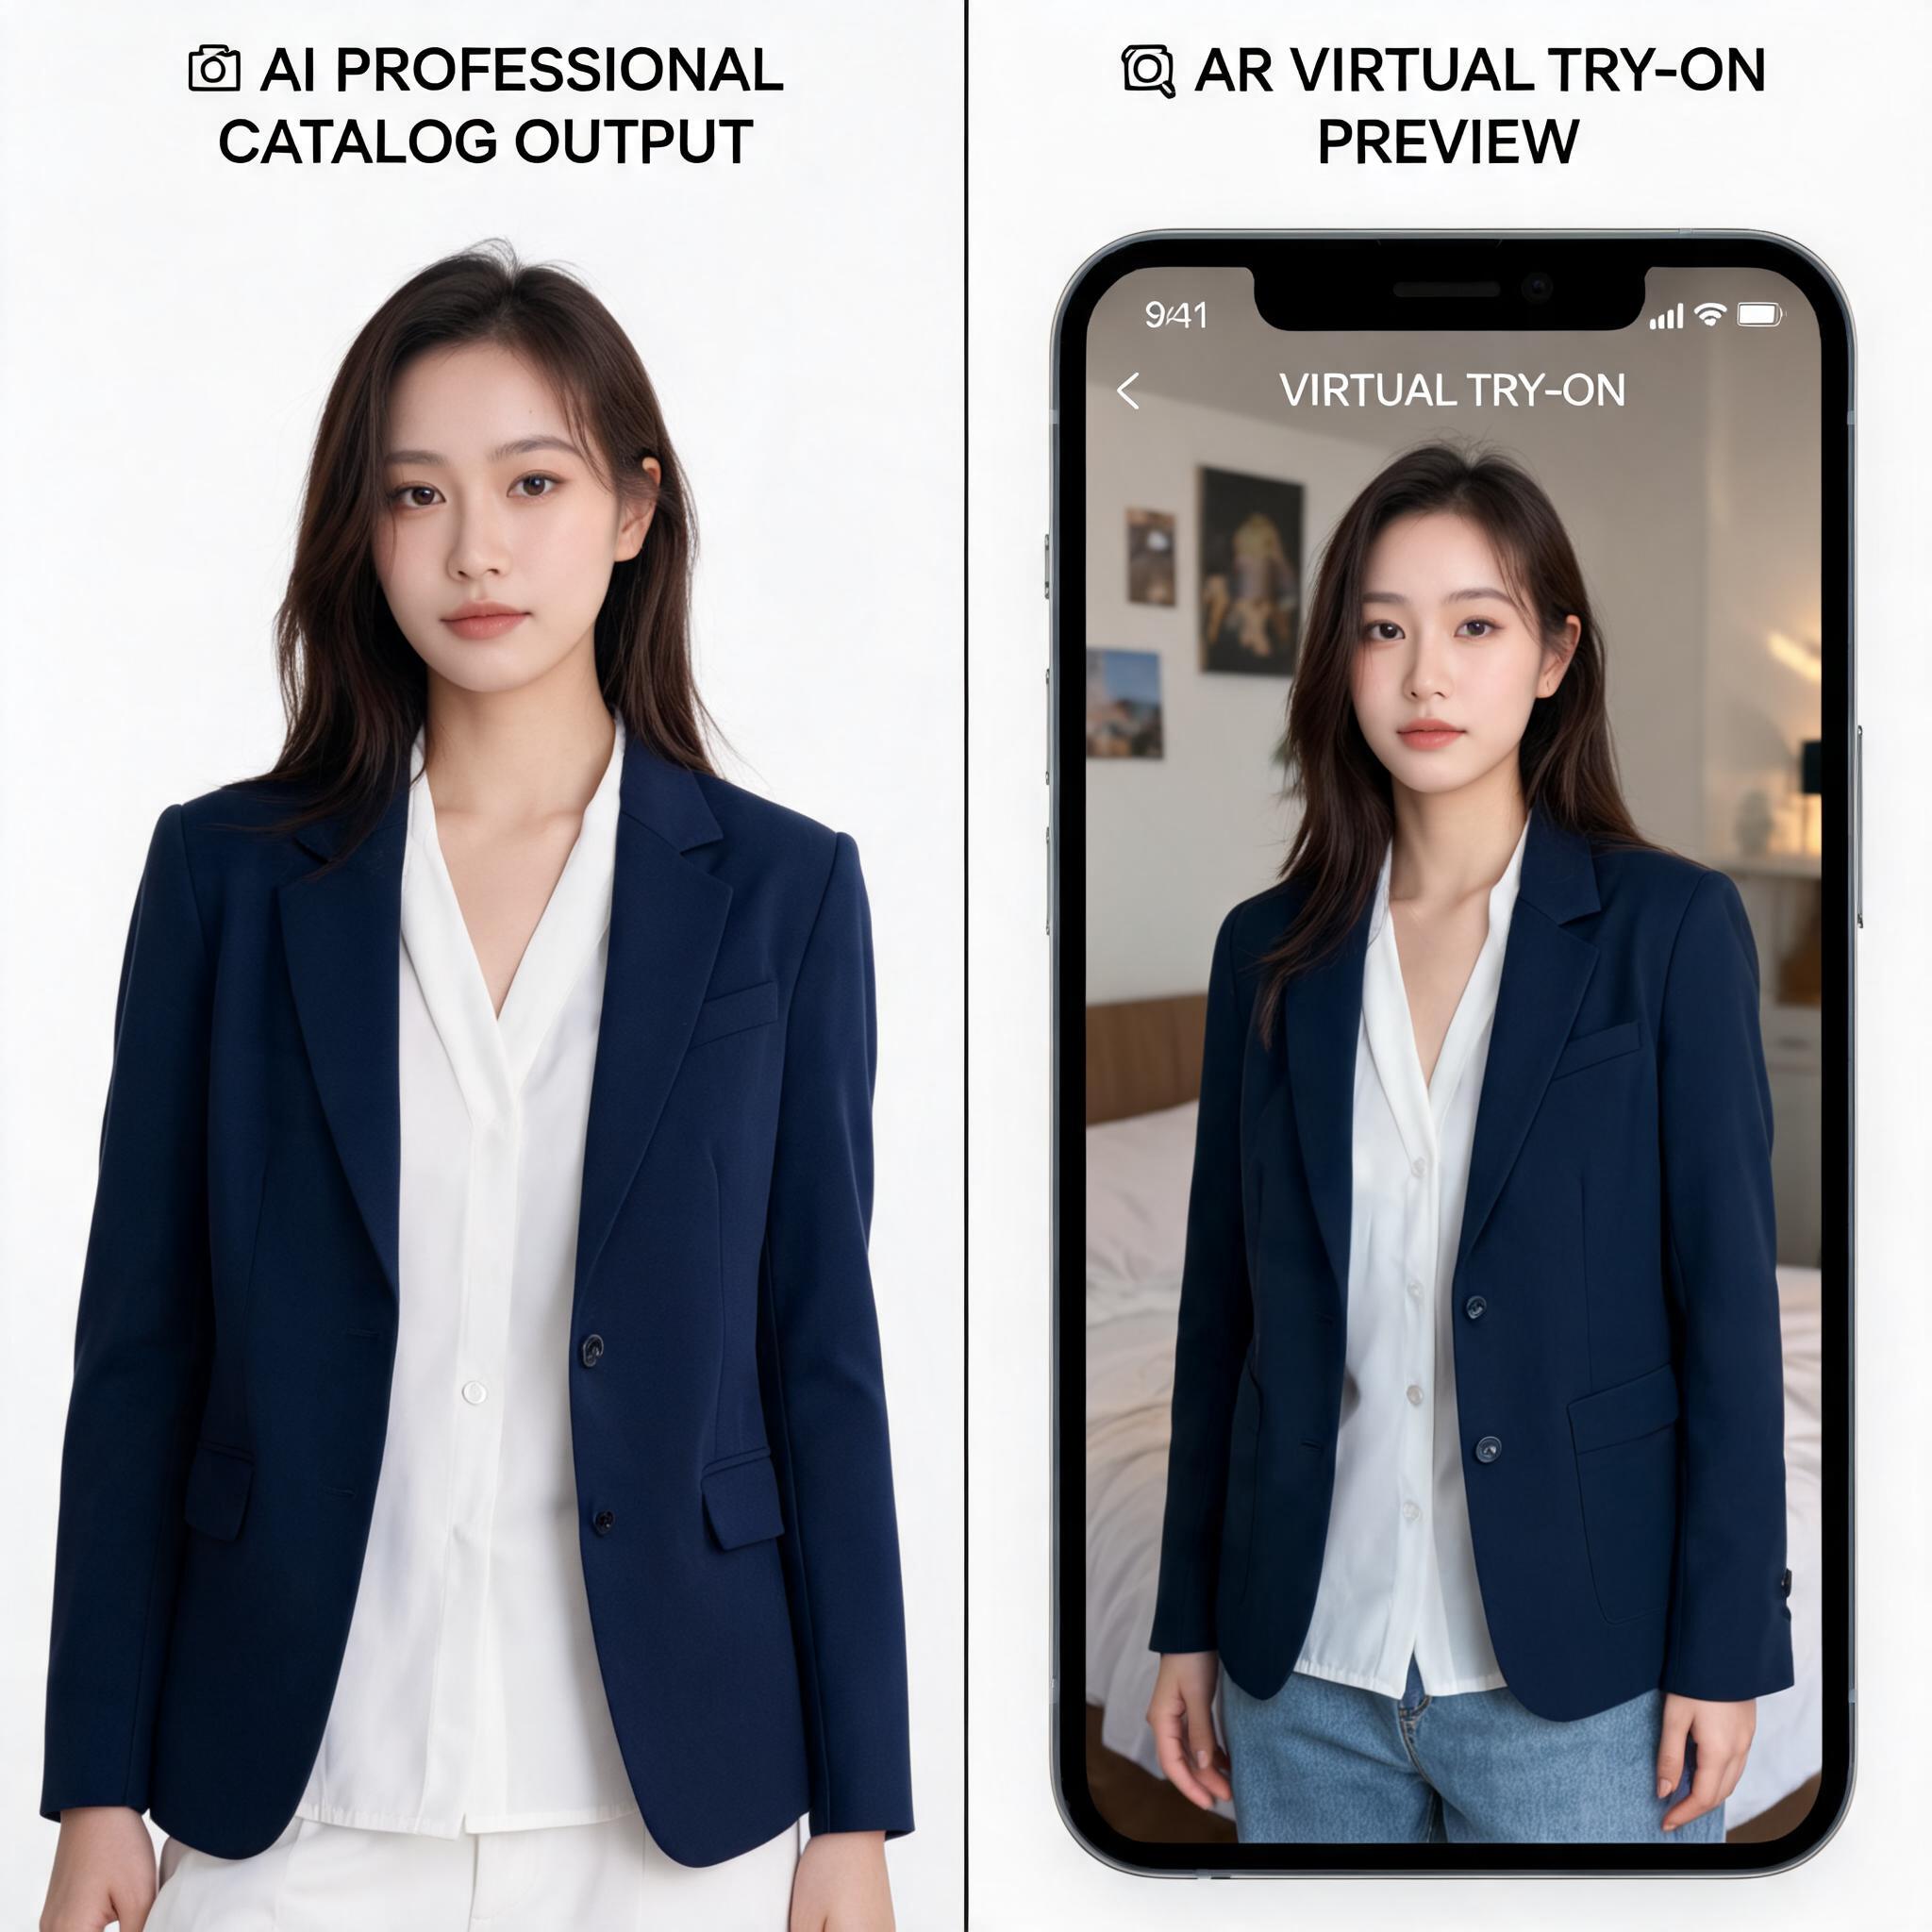
I spent the last month digging into virtual try on clothes technology—not the marketing claims, but the actual mechanics and the real ROI data from brands that have deployed it. Here's what I found: when implemented correctly, virtual try-on reduces returns by 25-40% and lifts conversions by 20-30%. When implemented poorly, it confuses shoppers and wastes engineering budget.
This guide covers what virtual try on clothes actually does, the different approaches available in 2026, what the data says, and how to roll it out without wasting time or money.
What virtual try on clothes actually does
At its simplest, virtual try on clothes uses AI to show how a garment would look on a body. But there are two fundamentally different ways to achieve this, and confusing them is how most brands waste their budget.
Type 1: Shopper-facing virtual try-on (decision support)
This is the version shoppers interact with. They upload a photo of themselves (or select a model that represents their body type), and the AI renders the garment onto that body. The output is a preview—not a final catalog image. Its job is to answer the question: "Will this look right on me?"
Google Shopping already embeds this into search results for apparel queries. A shopper searching for a blazer can see a virtual try-on preview directly in the SERP before clicking through. Amazon rolled out a similar feature for shoes and apparel in 2023, and in 2026 it covers most clothing categories on the platform.
Type 2: Merchant-facing model generation (content production)
This is what tools like ezpixy's AI fashion model generator do. You upload a garment photo—a flat lay, a mannequin shot, or a hanger image—and the AI generates a polished on-model image. The output is a catalog asset you can use on product pages, marketplaces, and ads. No shopper photo is involved. The goal is production efficiency: replace expensive photoshoots with AI-generated model imagery that's consistent across SKUs.
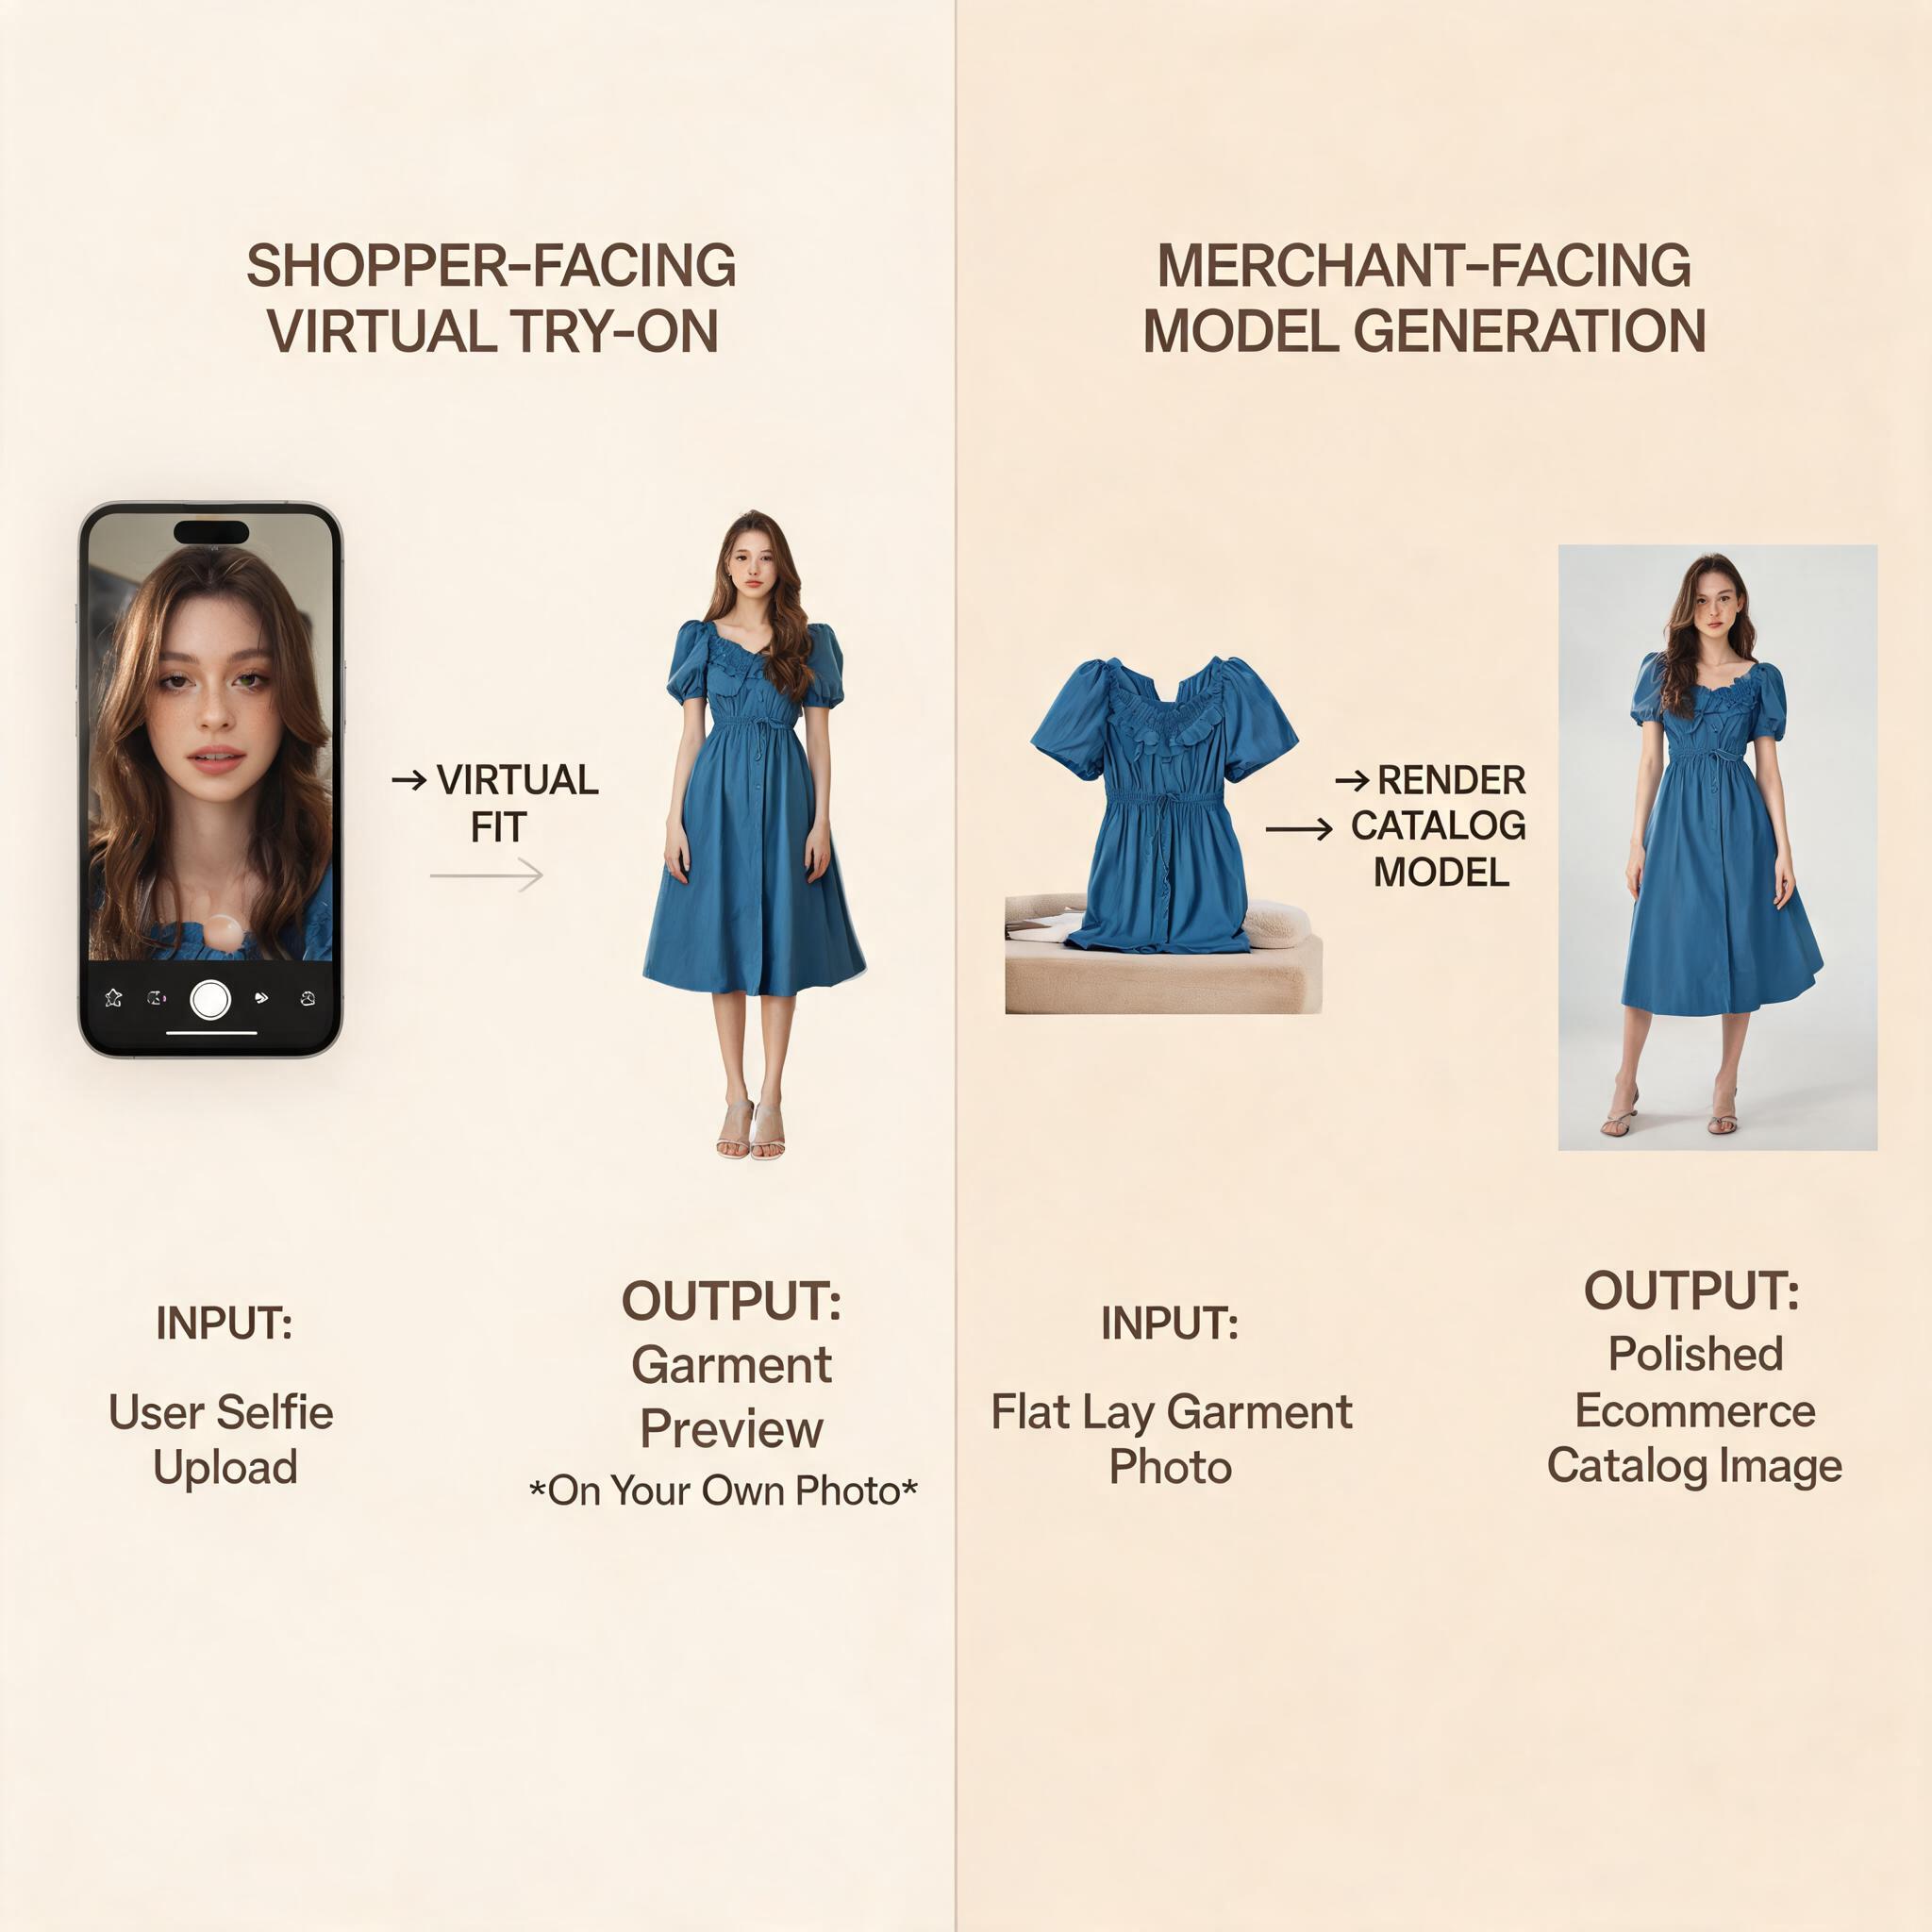
Most brands need both, but they need them at different stages. Start with merchant-facing model generation if your bottleneck is content production. Add shopper-facing try-on when your traffic justifies the investment in interactive features.
How the technology actually works
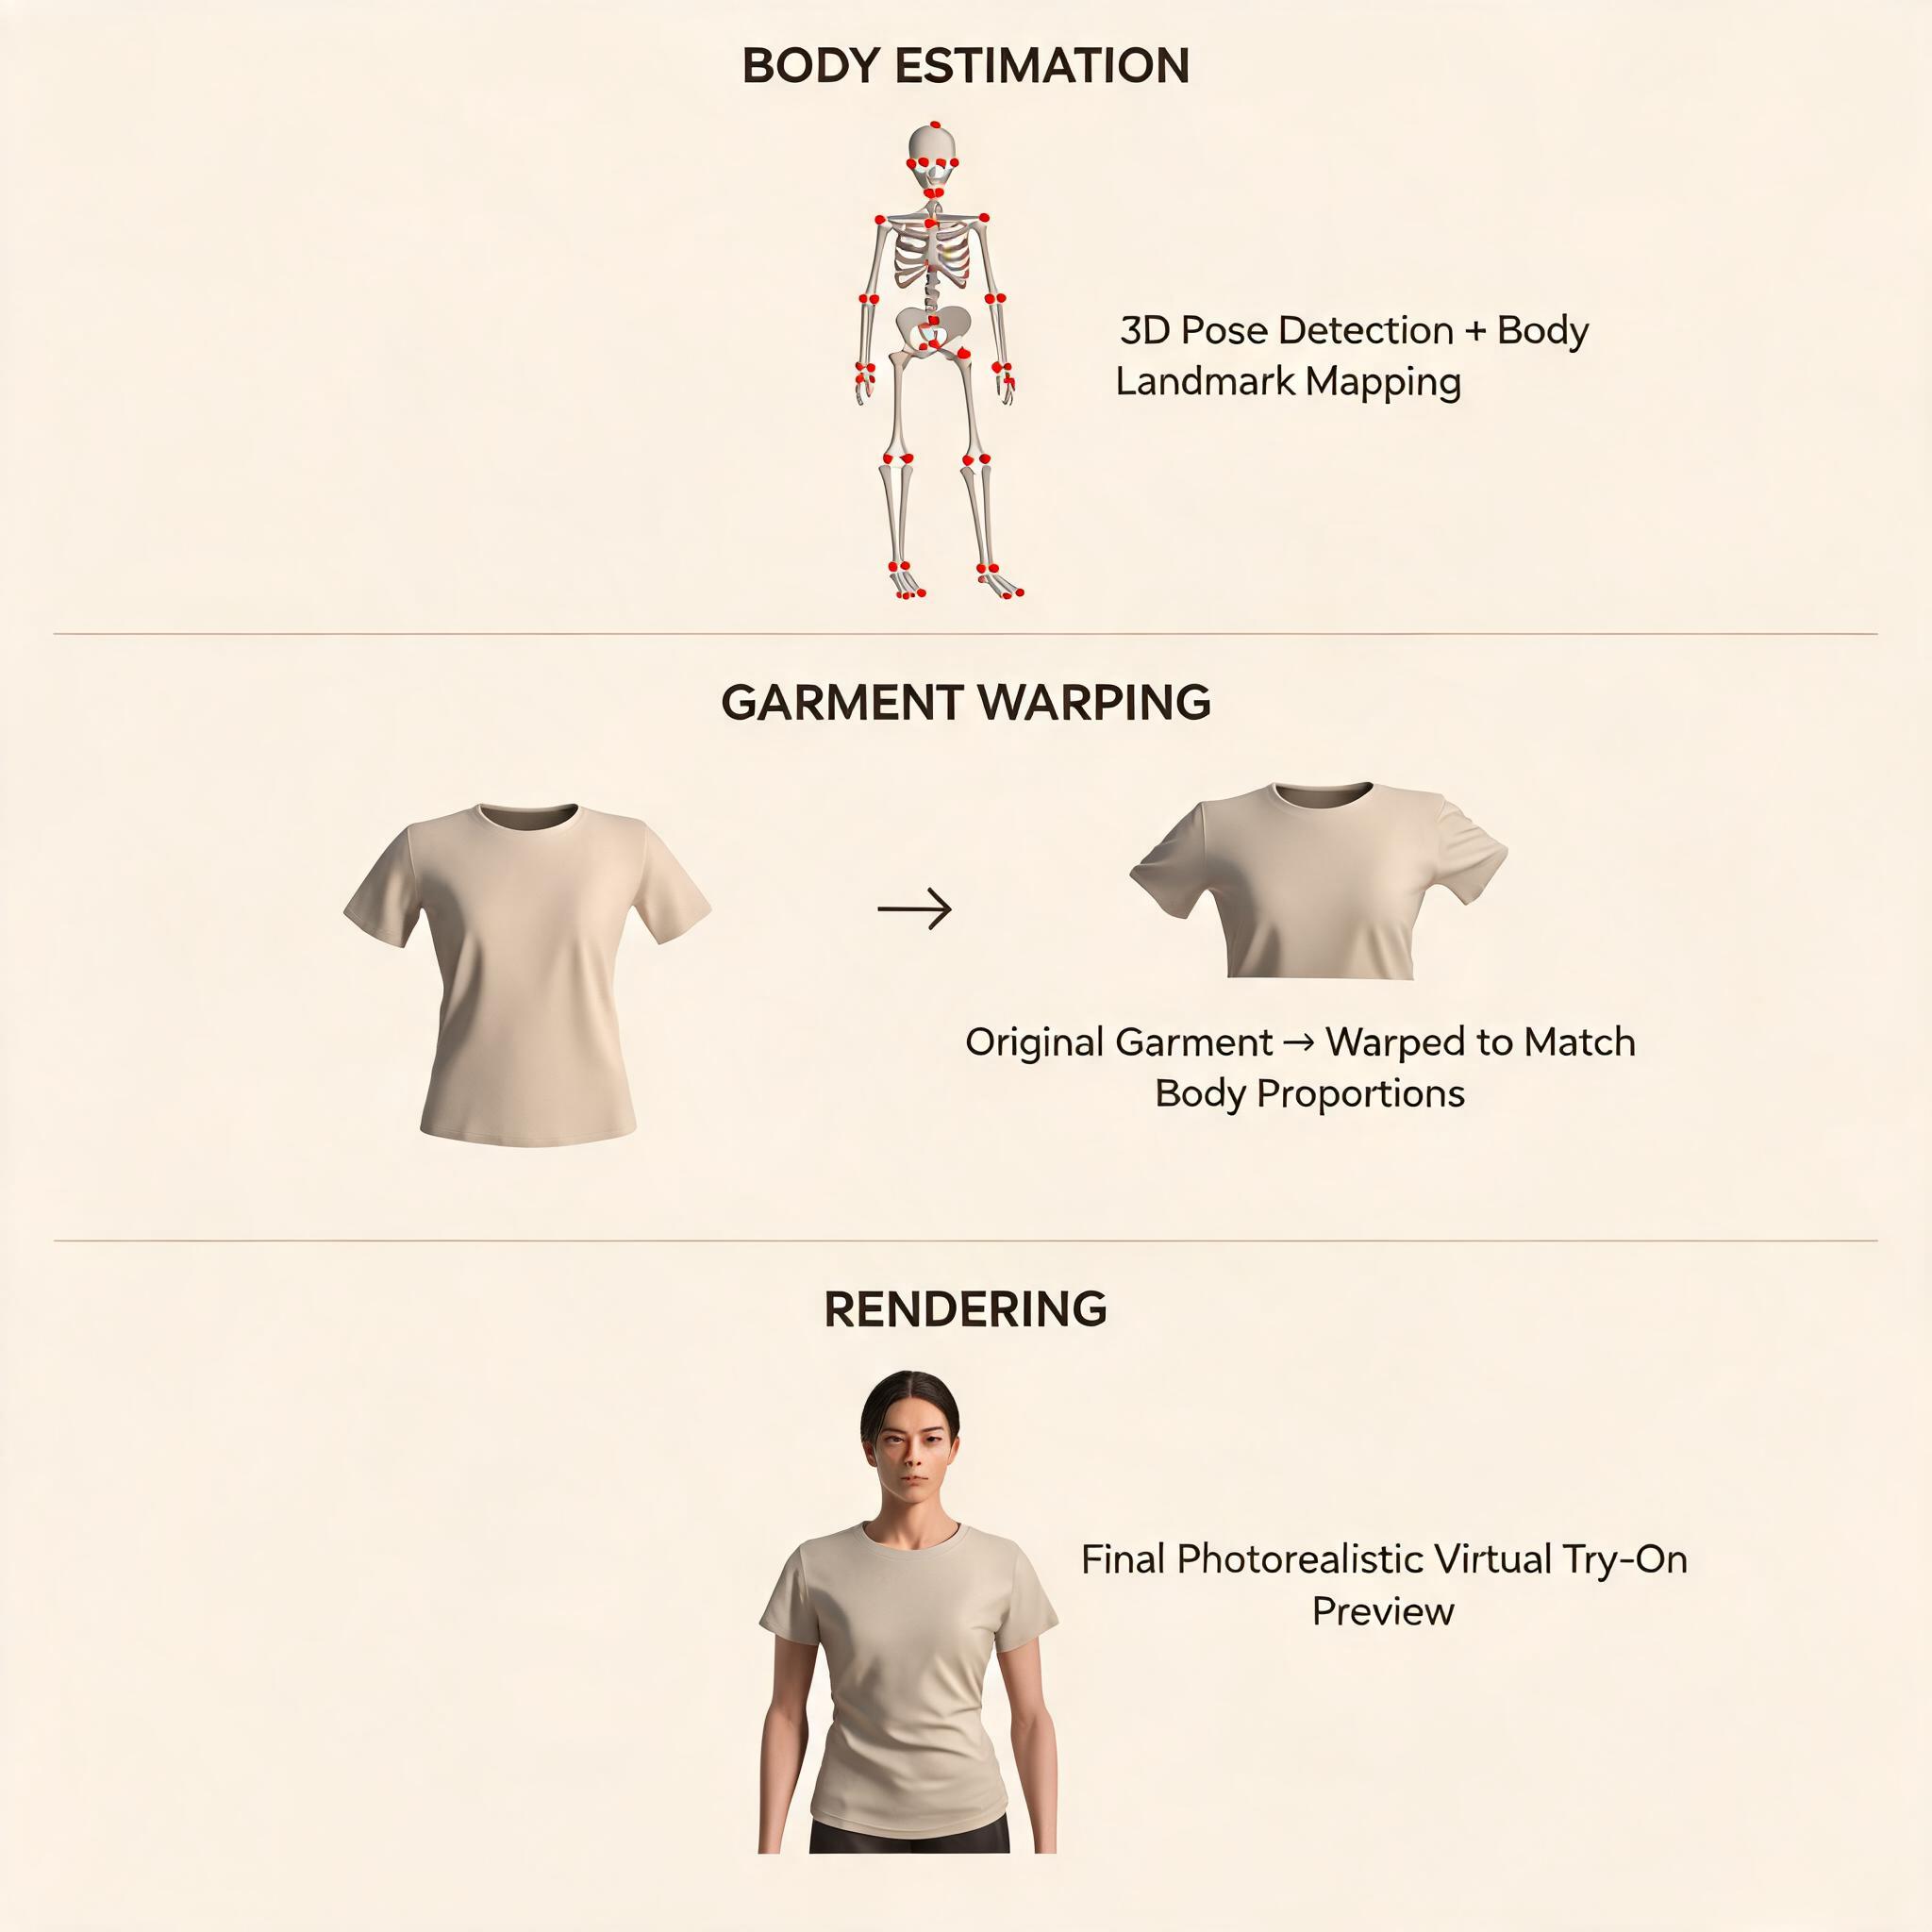
Modern virtual try on clothes systems run on three AI layers that work in sequence. Understanding these layers helps you evaluate tools and set realistic expectations.
Layer 1: Body estimation and pose detection
The AI first analyzes the body image—whether it's a shopper selfie or a reference photo. Using pose estimation models, it identifies key landmarks: shoulders, elbows, wrists, hips, knees, ankles. It constructs a skeletal map and estimates dimensions including torso length, shoulder width, and limb proportions. Advanced systems generate a dense body mesh that captures contours even from a 2D image. This is why good lighting and visible body shape matter more than camera quality for shopper-facing try-on.Shopify Enterprise Blog
Layer 2: Garment warping and deformation
The garment image is processed separately. The AI segments it from its background, identifies structure (sleeves, collar, hemline, closures), and warps it to match the target body's pose and proportions. This is where diffusion-based models pull ahead of older GAN-based approaches. Instead of stretching a flat image like a rubber sheet, the AI generates new pixels that simulate how fabric would naturally drape, fold, and crease on the specific body shape. Pattern alignment, button placement, and seam lines are preserved throughout.
Layer 3: Rendering and compositing
The warped garment is composited onto the person's image with proper occlusion, lighting consistency, and edge blending. The output is a single image that looks like the person was photographed wearing the garment. Processing time in 2026 ranges from 2-10 seconds per image for most systems, down from 20-30 seconds in 2024.
The ROI data: what brands are actually seeing
The numbers have moved from vendor marketing claims to published case studies. Here's what multiple sources report:
| Metric | Range | Source |
|---|---|---|
| Return rate reduction | 25-40% | Multiple retailer case studies, 2025-2026 |
| Conversion lift | 20-30% | Shopify Enterprise, Fashio AI data |
| Average order value increase | 12-18% | Fashio Labs ecommerce guide |
| Photoshoot cost reduction | Up to 90% | StyleBuddy, Fit It On data |
| Shopper adoption (Gen Z) | 68% consider it essential | Consumer survey data |
The return rate reduction alone justifies the investment for most mid-sized apparel brands. At a 30% return rate on clothing, a brand doing $5M in annual online revenue is refunding roughly $1.5M. Reducing returns by even 25% recovers $375,000—far more than the cost of most virtual try-on implementations.
Step-by-step: how to implement virtual try on clothes for your store
I've distilled this from brands that did it right and brands that wasted six months on a half-baked implementation.
Step 1: Fix your product data first
Virtual try-on amplifies what's already there. If your product images are inconsistent—different lighting, different models, different crops—the AI will produce inconsistent results. Before buying any try-on tool:
- Standardize your product photography (same lighting setup, same angles, same resolution)
- Ensure every SKU has clean, front-facing garment images
- Remove watermarks, text overlays, and background clutter from source images
- Size and fit data should be accurate and complete
A brand I spoke with spent $30,000 on a try-on widget only to discover that 40% of their product images were shot on mannequins at odd angles that the AI couldn't parse. They spent another three months reshooting before the tool produced acceptable results.
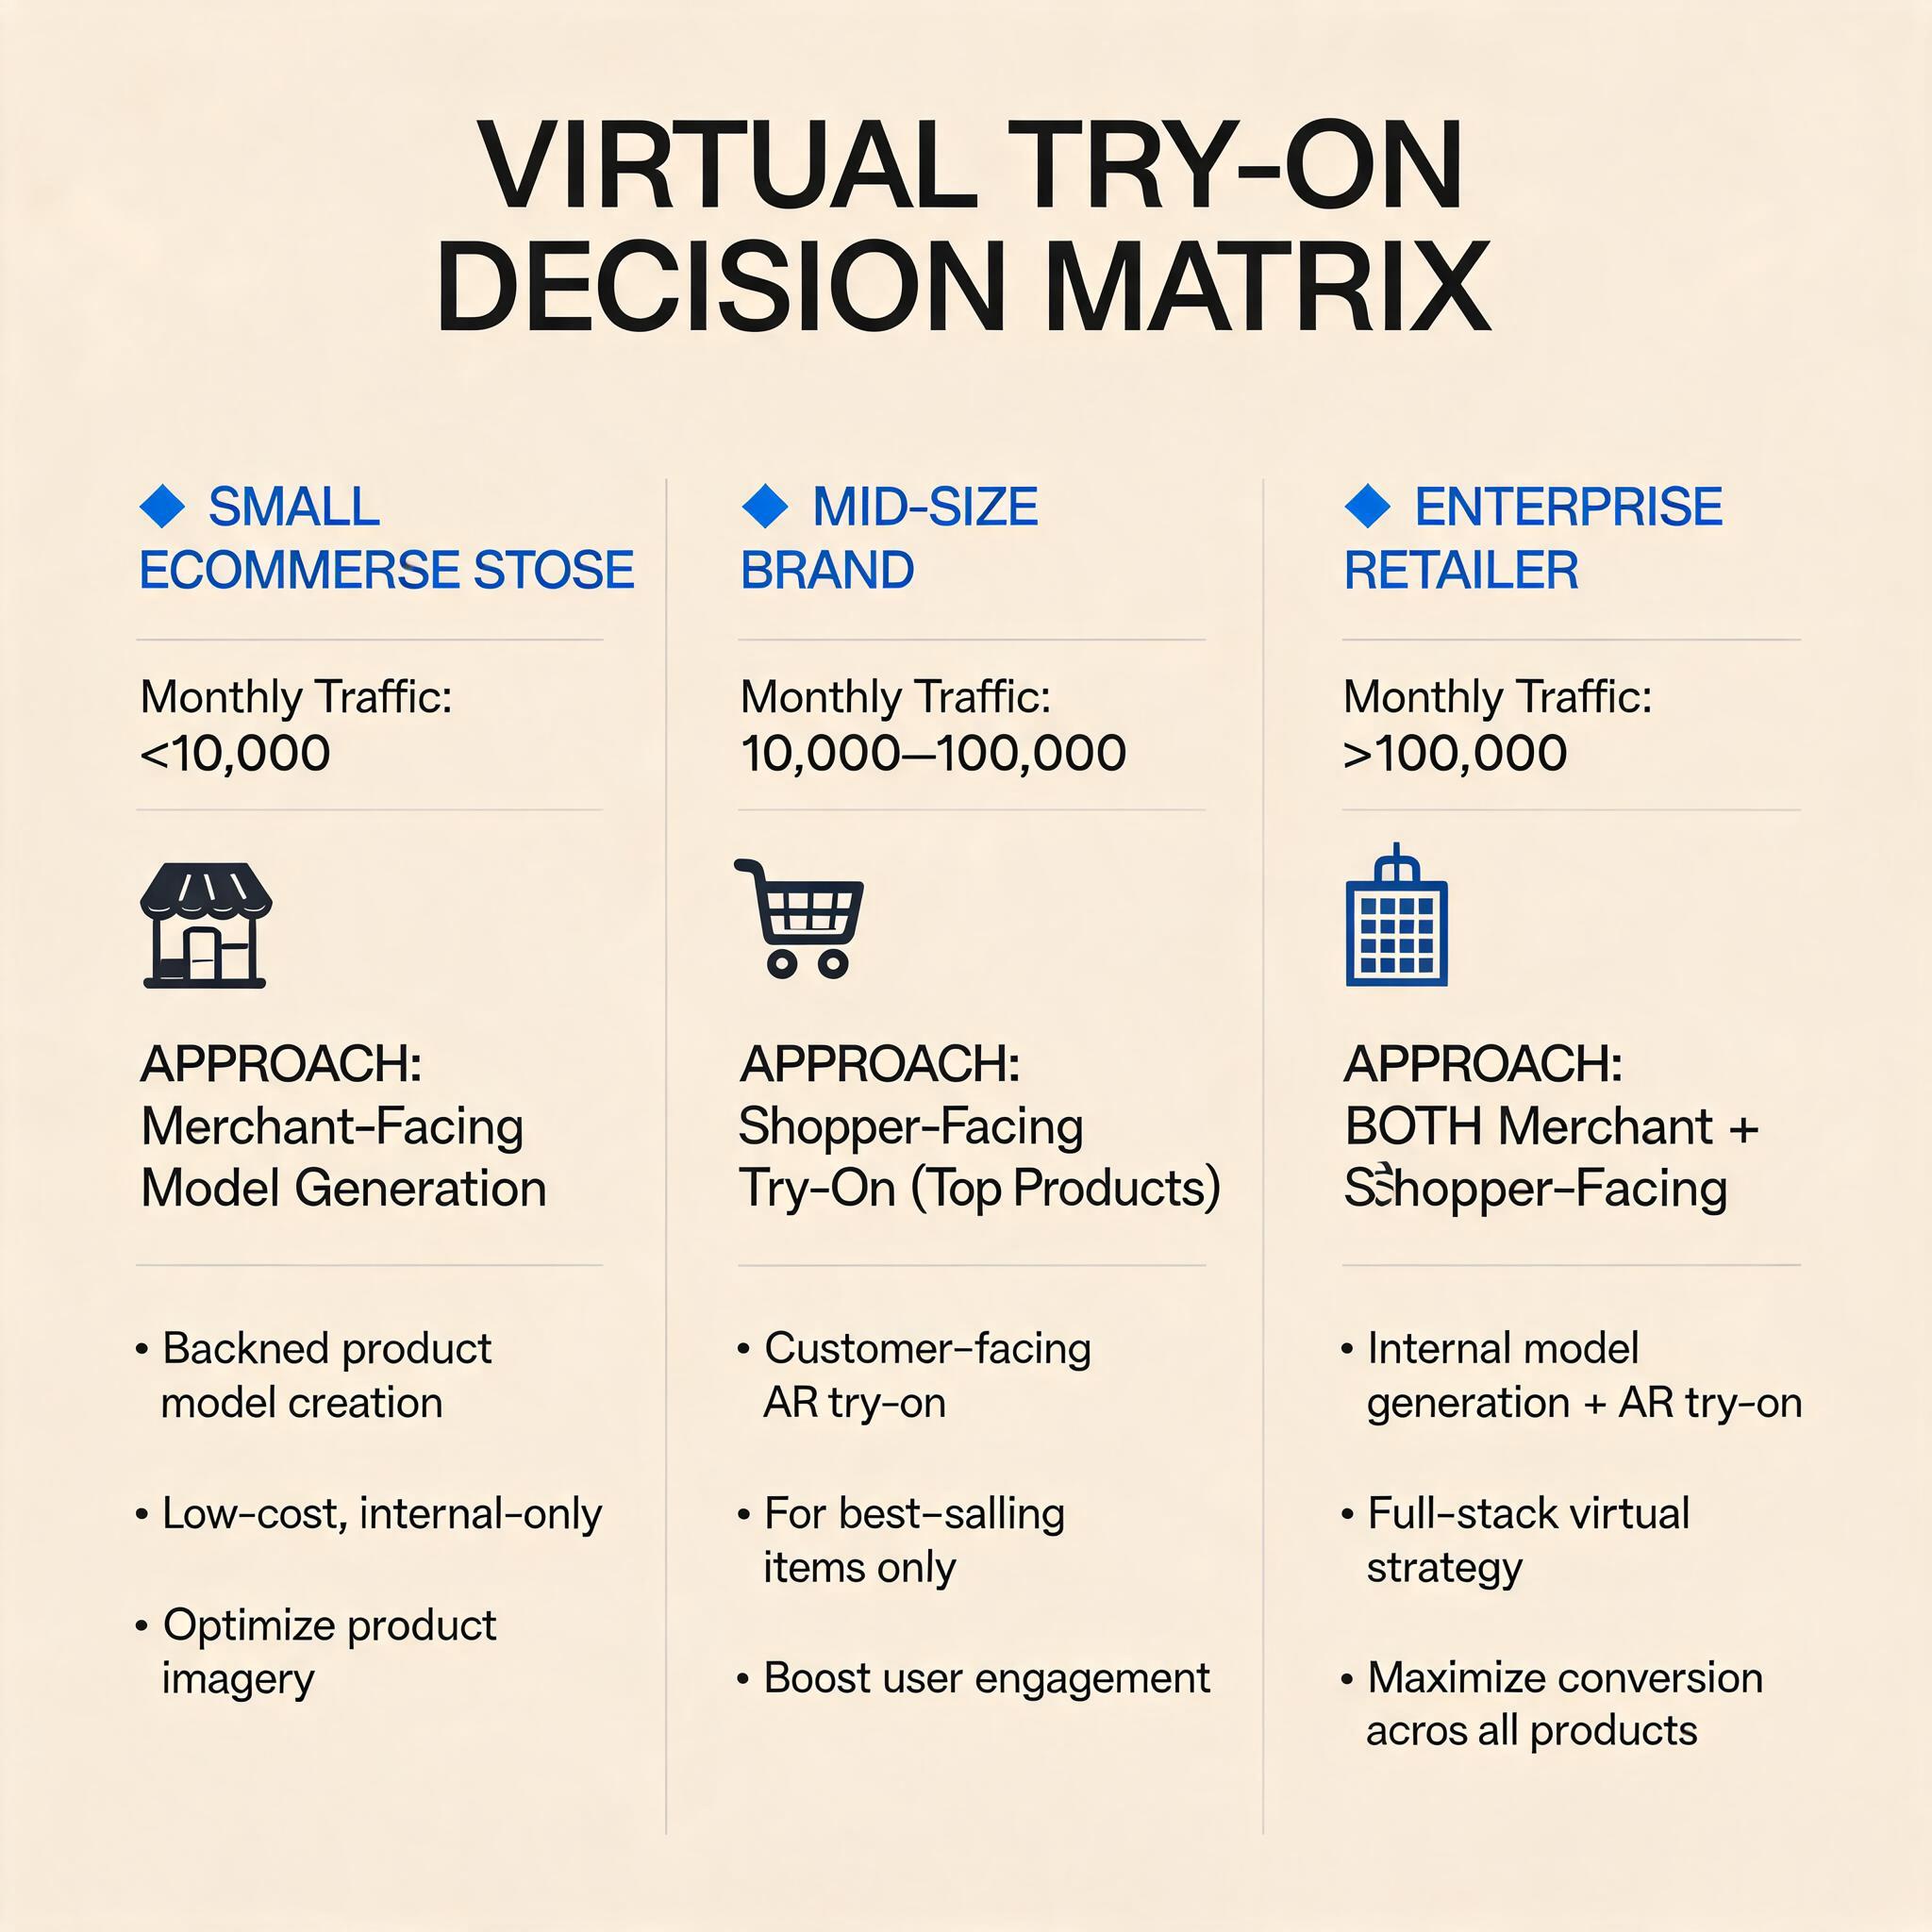
Step 2: Choose your approach based on your traffic and catalog
If you have fewer than 50 SKUs and under 10,000 monthly visitors:
Start with merchant-facing model generation. Use ezpixy's AI fashion model generator to create consistent on-model imagery for your catalog. This solves the content quality problem first—which is usually the bottleneck at this stage.
If you have 50-500 SKUs and 10,000-100,000 monthly visitors:
Add shopper-facing try-on for your top 20% of products (the ones driving 80% of traffic). Use a widget that integrates with your platform. Focus on categories where fit uncertainty is highest: dresses, fitted tops, tailored items.
If you have 500+ SKUs and 100,000+ monthly visitors:
Deploy both approaches. Merchant-facing generation for catalog production efficiency. Shopper-facing try-on for high-traffic PDPs. Feed the same product data into both systems to avoid maintaining two separate pipelines.
Step 3: Pick a tool that matches your platform
| Platform | Virtual try-on options | Integration complexity |
|---|---|---|
| Shopify | Multiple apps (StyleBuddy, Fit It On, etc.) | Low—app store install |
| WooCommerce | Plugin-based solutions | Medium—some setup required |
| Custom storefront | API-based (ezpixy, Fashio AI) | High—dev time needed |
| Amazon | Built-in try-on available for enrolled brands | Low—Amazon handles it |
| Google Shopping | Auto-enabled for qualifying products | None—Google does it |
For Shopify stores, start with an app. You can test the impact on returns and conversions without any custom development. For custom storefronts, virtual try-on for clothing platforms with APIs give you the most control but require engineering effort.
Step 4: Measure the right metrics
Don't just look at "did returns go down?" Measure these specifically:
- Return rate by category: Some categories benefit more from try-on than others. Measure per category, not just overall.
- Conversion rate on PDPs with try-on vs. without: Build an A/B test. If try-on doesn't lift conversions, the UX is likely the problem, not the concept.
- Average session duration on try-on PDPs: If shoppers spend more time on pages with try-on, that's a strong engagement signal.
- Customer photos uploaded vs. try-ons completed: A high drop-off at the photo upload step usually means the upload UX is too demanding—ask for less, or offer a "select a model" fallback.
Step 5: Communicate what try-on can and can't do
This is where most brands stumble. Shoppers who expect exact fit prediction will be disappointed and may return items at a higher rate. Be explicit:
- "This shows how the garment looks visually—it is not a guarantee of exact fit."
- "Actual colors may vary slightly from what you see on screen."
- "Fit depends on your measurements and the specific size you select."
Google's own virtual try-on documentation includes similar disclaimers. Being upfront manages expectations and reduces post-purchase disappointment.Google Shopping Help
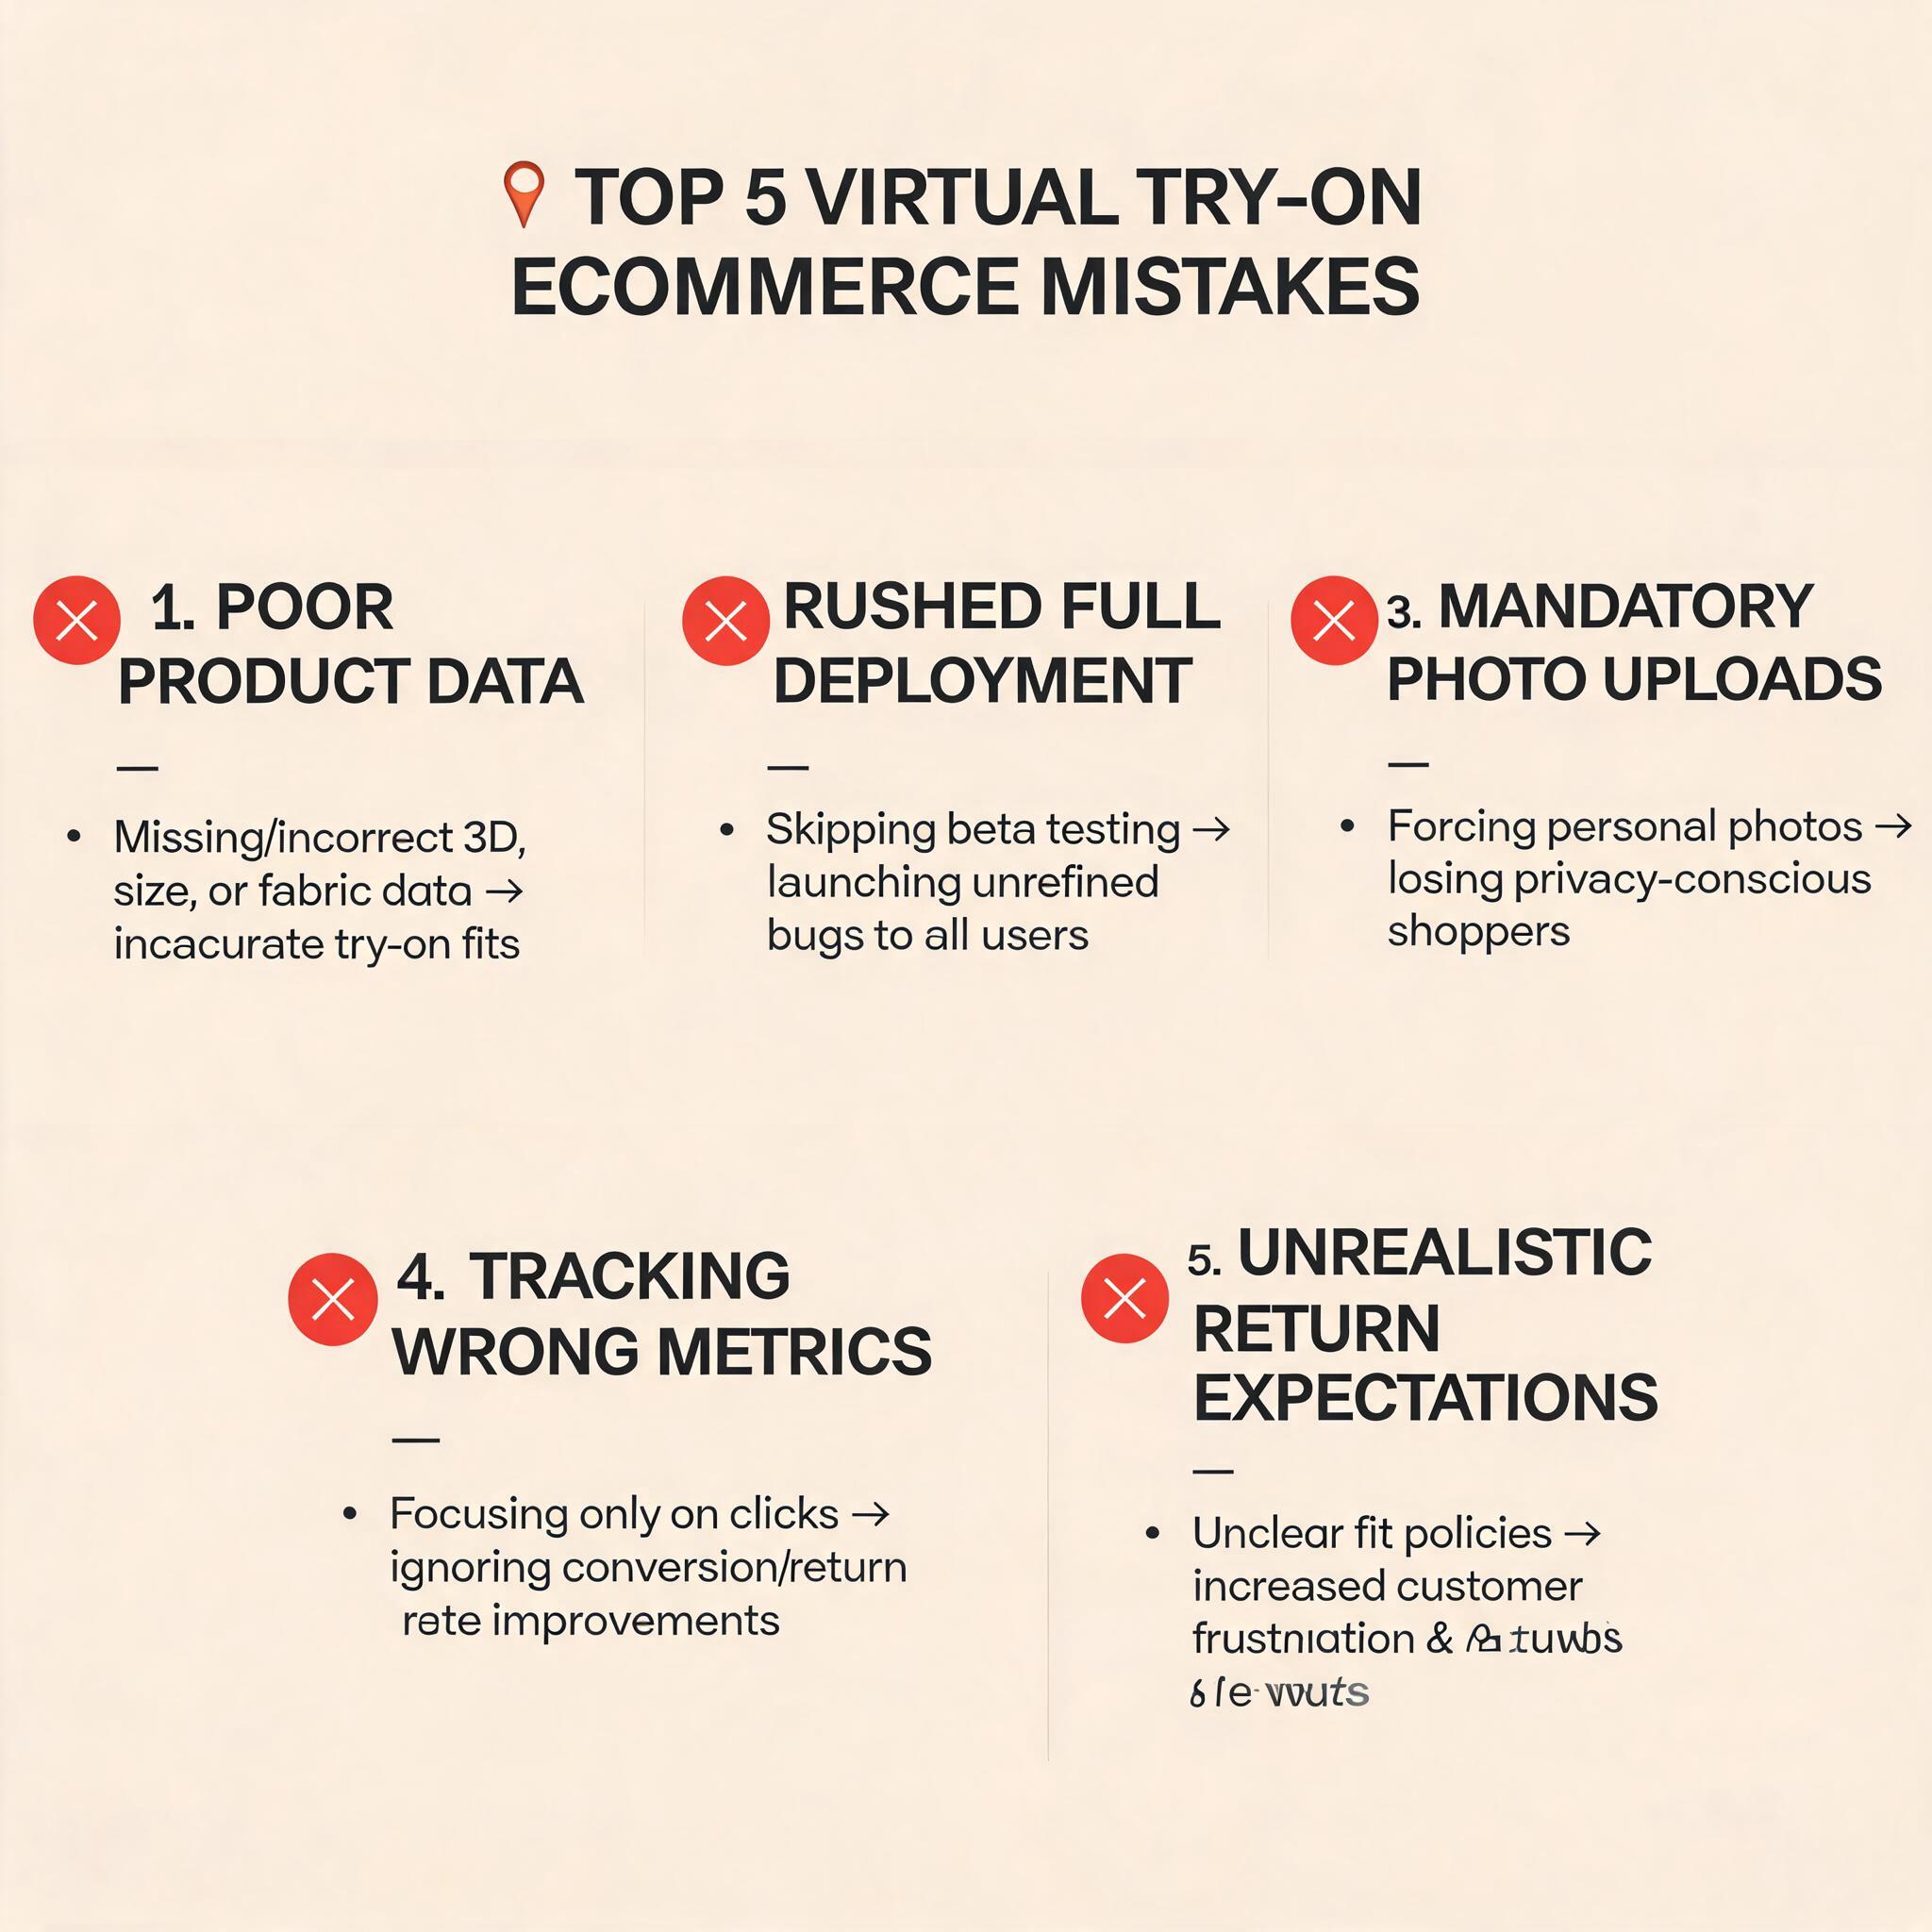
Common mistakes that waste time and budget
Mistake 1: Buying try-on before fixing product images
If your source images are inconsistent, try-on will amplify the inconsistency. Fix your photography pipeline first.
Mistake 2: Deploying to all products at once
Start with one category, measure the impact, then expand. A staged rollout also lets you fix problems before they affect your entire catalog.
Mistake 3: Making photo upload mandatory
Requiring shoppers to upload a photo creates friction. Offer a "use a sample model" option as a fallback. About 40-60% of shoppers will choose the model option over uploading their own photo, and they still get value from the preview.
Mistake 4: Not tracking the right metrics
Vendors will show you engagement numbers. You need business metrics: return rate, conversion rate, and average order value. If those don't move, the engagement numbers don't matter.
Mistake 5: Expecting try-on to eliminate returns entirely
Virtual try-on reduces returns by 25-40%. It doesn't eliminate them. Fit, fabric feel, and color accuracy issues still exist. Set internal expectations accordingly.
What virtual try-on can't do (yet)
- Predict exact fit across multiple sizes. Virtual try-on shows visual appearance, not precise measurements. For size prediction, you need a separate size recommendation tool.
- Handle complex layered outfits. Wearing a jacket over a dress over a top? Most systems can't render multiple layers with realistic drape for each.
- Simulate fabric feel. Stretch, weight, texture—these are tactile experiences that no screen can replicate.
- Work well with poor-quality input photos. Dark, grainy, or low-resolution shopper photos produce poor results.
How ezpixy fits into the virtual try-on landscape
ezpixy focuses primarily on the merchant-facing side: generating on-model catalog images from garment photos. This is the content production layer that feeds into both your storefront and any shopper-facing try-on you might add later.
The AI fashion model generator takes flat lays, mannequin shots, or hanger photos and produces consistent on-model images. From there, you can process outputs through white background removal for marketplace compliance, or feed them into AI product photo workflows for channel-specific formats.
If you're evaluating the broader landscape, see my comparison of AI clothes changer vs virtual try-on for a detailed breakdown of where each workflow fits.
FAQ
Does virtual try on clothes reduce returns?
Yes—published data shows 25-40% return rate reductions when implemented correctly. The impact is strongest in categories where visual expectation mismatch is the main reason for returns, such as dresses, fitted items, and tailored clothing.
Can I implement virtual try-on without a developer?
On Shopify, yes. Multiple apps offer plug-and-play virtual try-on with no coding required. On custom platforms, you'll need development resources.
Does virtual try-on work for all clothing types?
Most systems handle tops, dresses, outerwear, and bottoms well. Complex items like multi-layered outfits, highly textured fabrics, or items with intricate draping are harder. Test with your actual products before committing.
What's the difference between virtual try-on and an AI clothes changer?
Virtual try-on is primarily for shoppers—it helps them preview how a garment might look before buying. An AI clothes changer is primarily for merchants—it generates new catalog images from garment photos. They solve different problems, though the underlying technology overlaps.
How much does virtual try-on cost?
Shopify apps range from $29-199/month. API-based solutions charge per image generated, typically $0.10-0.50 per try-on. Enterprise implementations with custom integration can run $5,000-20,000 in initial setup plus ongoing usage fees.
Can I use AI-generated model images for virtual try-on?
Yes. Many brands use merchant-facing model generation to create consistent catalog imagery, then add shopper-facing try-on as a separate layer. The two approaches are complementary, not competing.
Ready to speed up your image workflow?
Generate AI fashion models, product photos, and virtual try-on images in minutes.